複数台のPrusa i3 MK3Sプリンターをネットワーク経由で制御しようと思ったのですが、クローンPrusa i3 MK3Sの制御ボードにシリアルナンバーが入っておらず、Repetier-Serverからそれぞれのクローン Prusaを識別することができない問題にぶつかりました。
公式サイトで購入したOriginal Prusa i3 MK3Sには、きちんとシリアルナンバーが入っています。
Original Prusa i3 MK3SをRaspberry PiにUSB接続した状態で以下のコマンドを実行すると、正しくシリアルナンバーが表示されます。
$udevadm info -a -n /dev/ttyACM0
~~~~
    ATTRS{serial}=="CZPX****X004X******" ← シリアルが出力される
次にクローン Prusa i3 MK3Sを接続して確認しても、ATTRS{serial}がありません。
$udevadm info -a -n /dev/ttyACM1
~~~~
ATTRS{serial}がない。
Repetier-Serverは、このシリアルナンバーをユニークなキーとしてプリンターを識別しているようなので困りました。。
で、困ったときのインターネットです。いろいろと禿げ上がりそうになりながら調べたところ、ありました!
同じ理由で識別できない問題を解決するためのツールで、シリアルナンバーをEinsyRamboに書き込むことが可能です。(さすが世界は広いですね。)
https://github.com/middelink/EinsySerialnumber.git
※このツールは、EinsyRamboのROMを書き換えますので、最悪の場合、制御ボードが動かなくなる可能性がありますので、自己責任の上で行ってくださいね。
早速、上記ツールを利用してクローンPrusaにシリアルナンバーを書き込んで行きたいと思います。
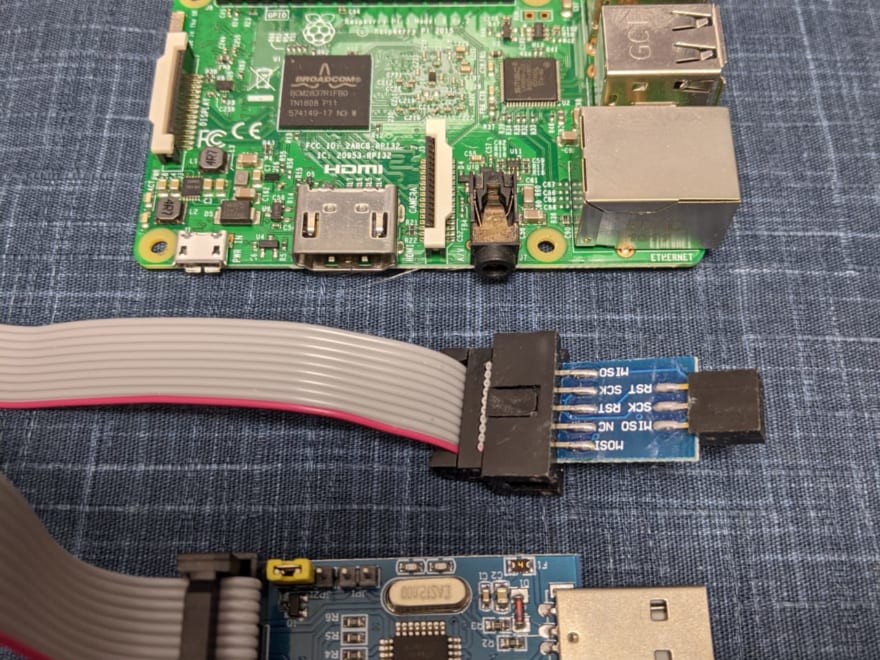
用意するものは、Raspberry Pi(なんでもいいと思います。)などのPCとUSB AVRプログラマ USBasp AVRライタの2つになります。
※今回は、Raspberry Piを使用しましたが、Goのプログラムが動けばLinux・Macでも大丈夫です。
試していませんが、WindowsでもWSLなどを使用すれば可能かと思います。(試していないので多分ですが。。)
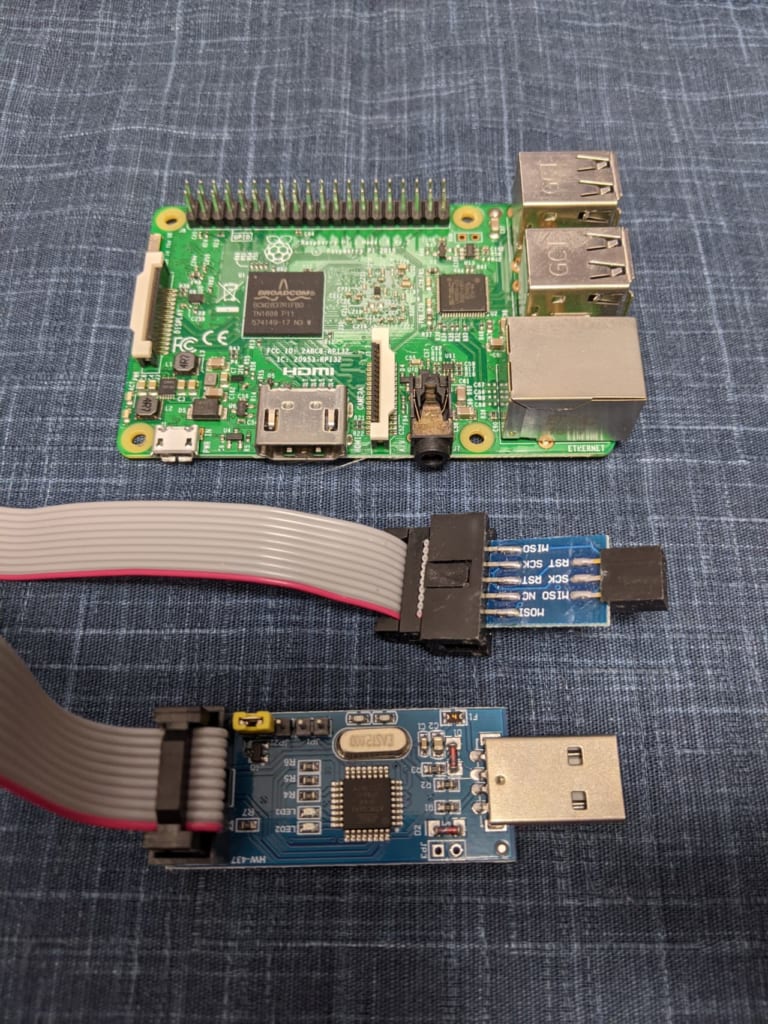
今回は、Raspberry Pi 3とAmazonで購入したAVRライタを利用します。
最新のRaspbery Pi OSだとavrdudeを使ったROMの吸出しに失敗したので、古いOSを使用した方がいいかもです。古いOS Imageは下記のリンクからダウンロード可能です。
Index of /raspbian/images (raspberrypi.org)
私の環境は、Raspberry Pi 3b+と2020-02-13-raspbian-buster.zipの組み合わせになります。
まずは、EinsySerialnumberは、Go言語で書かれており実行するにはコンパイルする必要がありますので、Raspberry PiにGoコンパイル環境をインストールします。
pi@develop:~ $ wget https://golang.org/dl/go1.15.12.linux-armv6l.tar.gz
pi@develop:~ $ sudo tar -C /usr/local -xzf go1.15.12.linux-armv6l.tar.gz
pi@develop:~ $ export PATH=$PATH:/usr/local/go/bin
arm版のGoコンパイラは、apt-getでインストールできないようなので、直接ダウンロードします。
pi@develop:~ $ go version
go version go1.15.12 linux/arm
go versionと入力されて、正しくversionが表示されればOKです。
次に、EinsySerialnumberを取得してコンパイルします。
pi@develop:~ $ git clone https://github.com/middelink/EinsySerialnumber.git
pi@develop:~ $ cd EinsySerialnumber/
pi@develop:~/EinsySerialnumber $ go build .
特に何も表示されなければビルドは成功です。同じディレクトリに、EinsySerialnumberファイルが作成されていると思います。
次にavrdudeをインストールします。
pi@develop:~/EinsySerialnumber $ sudo apt-get install avrdude -y
さらにavrdudeのconfファイルを取得します。
pi@develop:~/EinsySerialnumber $ git clone https://github.com/arduino/arduino-flash-tools.git
これで環境の準備は完了です。
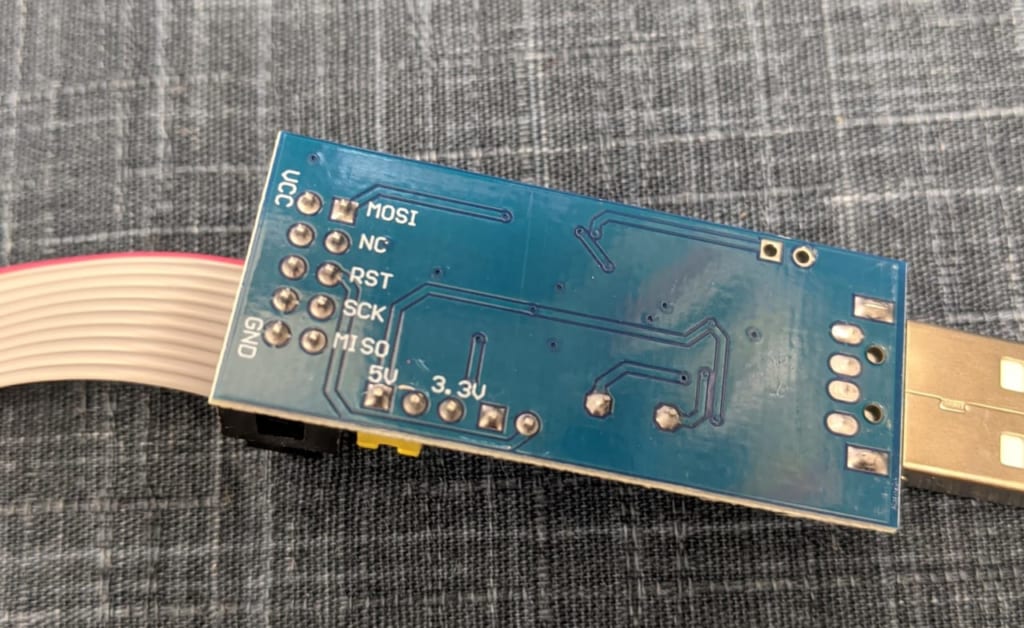
※USBaspの出力が5vになっていることを確認してください。なっていない場合は、ジャンパーピンで変更します。
次は、クローンPrusaのEinsyRamboボードのICSPピンにUSBaspを接続し、USB側をRaspberry Piに接続します。(念のためクローンPrusaの電源はOFFにして、USBの接続も外してください。)
接続ができたら、以下のコマンドで現在のROMを吸い出します。
arduino-flash-toolsは以下の~は、使用している環境に合わせて適宜変更してください。
pi@develop:~/EinsySerialnumber $ sudo avrdude -C arduino-flash-tools/tools_linux_arm/avrdude/etc/avrdude.conf -v -p atmega32u2 -c usbasp -P usb -U eeprom:r:32u2.eep:r
以下のメッセージが出力されれば、正常に吸い出しができています。
avrdude: Version 6.3-20171130
         Copyright (c) 2000-2005 Brian Dean, http://www.bdmicro.com/
         Copyright (c) 2007-2014 Joerg Wunsch

         System wide configuration file is "arduino-flash-tools/tools_linux_arm/avrdude/etc/avrdude.conf"
         User configuration file is "/root/.avrduderc"
         User configuration file does not exist or is not a regular file, skipping

         Using Port                    : usb
         Using Programmer              : usbasp
         AVR Part                      : ATmega32U2
         Chip Erase delay              : 9000 us
         PAGEL                         : PD7
         BS2                           : PC6
         RESET disposition             : possible i/o
         RETRY pulse                   : SCK
         serial program mode           : yes
         parallel program mode         : yes
         Timeout                       : 200
         StabDelay                     : 100
         CmdexeDelay                   : 25
         SyncLoops                     : 32
         ByteDelay                     : 0
         PollIndex                     : 3
         PollValue                     : 0x53
         Memory Detail                 :

                                  Block Poll               Page                       Polled
           Memory Type Mode Delay Size  Indx Paged  Size   Size #Pages MinW  MaxW   ReadBack
           ----------- ---- ----- ----- ---- ------ ------ ---- ------ ----- ----- ---------
           eeprom        65    20     4    0 no       1024    4    256  9000  9000 0x00 0x00
           flash         65     6   128    0 yes     32768  128    256  4500  4500 0x00 0x00
           lfuse          0     0     0    0 no          1    0      0  9000  9000 0x00 0x00
           hfuse          0     0     0    0 no          1    0      0  9000  9000 0x00 0x00
           efuse          0     0     0    0 no          1    0      0  9000  9000 0x00 0x00
           lock           0     0     0    0 no          1    0      0  9000  9000 0x00 0x00
           calibration    0     0     0    0 no          1    0      0     0     0 0x00 0x00
           signature      0     0     0    0 no          3    0      0     0     0 0x00 0x00

         Programmer Type : usbasp
         Description     : USBasp, http://www.fischl.de/usbasp/

avrdude: auto set sck period (because given equals null)
avrdude: AVR device initialized and ready to accept instructions

Reading | ################################################## | 100% 0.01s

avrdude: Device signature = 0x1e958a (probably m32u2)
avrdude: safemode: lfuse reads as EF
avrdude: safemode: hfuse reads as D9
avrdude: safemode: efuse reads as F4
avrdude: reading eeprom memory:

Reading | ################################################## | 100% 0.61s

avrdude: writing output file "32u2.eep"

avrdude: safemode: lfuse reads as EF
avrdude: safemode: hfuse reads as D9
avrdude: safemode: efuse reads as F4
avrdude: safemode: Fuses OK (E:F4, H:D9, L:EF)

avrdude done.  Thank you.
同じディレクトリに、32u2.eepファイル名で吸い出したROMのeepファイルが作成されています。
pi@develop:~/EinsySerialnumber $ ls -la 32u2.eep
-rw-r--r-- 1 root root 1024  5月  9 10:59 32u2.eep
EinsySerialnumberを使って、現在のシリアルナンバーを確認します。
pi@develop:~/EinsySerialnumber $ ./EinsySerialnumber
Serial number:
現在は、まだ何も書き込んでいないので、空が正常です。
では、本命のEinsySerialnumberを使ってシリアルナンバーを書き込みます。
シリアルナンバーは、19文字にする必要があるみたいです。あとシリアルナンバーに利用できる文字の制限は不明のため、大文字と数字だけの方が安全かもです。
EinsySerialnumberを使って、シリアルナンバー「MIKANPARTNERS000001」を書き込みます。(root権限でromを吸い出したので、sudoを付与して書き込んでいます。)
pi@develop:~/EinsySerialnumber $ sudo ./EinsySerialnumber MIKANPARTNERS000001
Serial number: MIKANPARTNERS000001
正常に書き込まれると、「Serial number: MIKANPARTNERS000001」と書き込んだシリアルナンバーが表示されます。
pi@develop:~/EinsySerialnumber $ ls -la 32u2.eep
-rw-r--r-- 1 root root 1024  5月  9 11:13 32u2.eep
吸い出したeepファイルの更新日時も変わっています。
これでシリアルナンバーを書き込んだファイルの準備ができましたので、avrdudeとUSBaspを利用して、EinsyRamboボードに書き込みます。
pi@develop:~/EinsySerialnumber $ sudo avrdude -C arduino-flash-tools/tools_linux_arm/avrdude/etc/avrdude.conf -v -p atmega32u2 -c usbasp -P usb -U eeprom:w:32u2.eep:r
以下のメッセージが表示されれば、正常に書き込みが完了しています。
avrdude: Version 6.3-20171130
         Copyright (c) 2000-2005 Brian Dean, http://www.bdmicro.com/
         Copyright (c) 2007-2014 Joerg Wunsch

         System wide configuration file is "arduino-flash-tools/tools_linux_arm/avrdude/etc/avrdude.conf"
         User configuration file is "/root/.avrduderc"
         User configuration file does not exist or is not a regular file, skipping

         Using Port                    : usb
         Using Programmer              : usbasp
         AVR Part                      : ATmega32U2
         Chip Erase delay              : 9000 us
         PAGEL                         : PD7
         BS2                           : PC6
         RESET disposition             : possible i/o
         RETRY pulse                   : SCK
         serial program mode           : yes
         parallel program mode         : yes
         Timeout                       : 200
         StabDelay                     : 100
         CmdexeDelay                   : 25
         SyncLoops                     : 32
         ByteDelay                     : 0
         PollIndex                     : 3
         PollValue                     : 0x53
         Memory Detail                 :

                                  Block Poll               Page                       Polled
           Memory Type Mode Delay Size  Indx Paged  Size   Size #Pages MinW  MaxW   ReadBack
           ----------- ---- ----- ----- ---- ------ ------ ---- ------ ----- ----- ---------
           eeprom        65    20     4    0 no       1024    4    256  9000  9000 0x00 0x00
           flash         65     6   128    0 yes     32768  128    256  4500  4500 0x00 0x00
           lfuse          0     0     0    0 no          1    0      0  9000  9000 0x00 0x00
           hfuse          0     0     0    0 no          1    0      0  9000  9000 0x00 0x00
           efuse          0     0     0    0 no          1    0      0  9000  9000 0x00 0x00
           lock           0     0     0    0 no          1    0      0  9000  9000 0x00 0x00
           calibration    0     0     0    0 no          1    0      0     0     0 0x00 0x00
           signature      0     0     0    0 no          3    0      0     0     0 0x00 0x00

         Programmer Type : usbasp
         Description     : USBasp, http://www.fischl.de/usbasp/

avrdude: auto set sck period (because given equals null)
avrdude: AVR device initialized and ready to accept instructions

Reading | ################################################## | 100% 0.01s

avrdude: Device signature = 0x1e958a (probably m32u2)
avrdude: safemode: lfuse reads as EF
avrdude: safemode: hfuse reads as D9
avrdude: safemode: efuse reads as F4
avrdude: reading input file "32u2.eep"
avrdude: writing eeprom (1024 bytes):

Writing | ################################################## | 100% 10.33s

avrdude: 1024 bytes of eeprom written
avrdude: verifying eeprom memory against 32u2.eep:
avrdude: load data eeprom data from input file 32u2.eep:
avrdude: input file 32u2.eep contains 1024 bytes
avrdude: reading on-chip eeprom data:

Reading | ################################################## | 100% 0.62s

avrdude: verifying ...
avrdude: 1024 bytes of eeprom verified

avrdude: safemode: lfuse reads as EF
avrdude: safemode: hfuse reads as D9
avrdude: safemode: efuse reads as F4
avrdude: safemode: Fuses OK (E:F4, H:D9, L:EF)

avrdude done.  Thank you.
さてさて、これでシリアルナンバーの書き込みは完了になります。
再度、USBにEinsyRamboボードを接続して、udevadmできちんとシリアルナンバーが書き込まれているから確認してみましょう。
$udevadm info -a -n /dev/ttyACM1
~~~~
    ATTRS{serial}=="MIKANPARTNERS000001" ← シリアルが出力される
ぉぉぉぉ!!。ちゃんと書き込んだシリアルナンバーが出力されるようになりました!
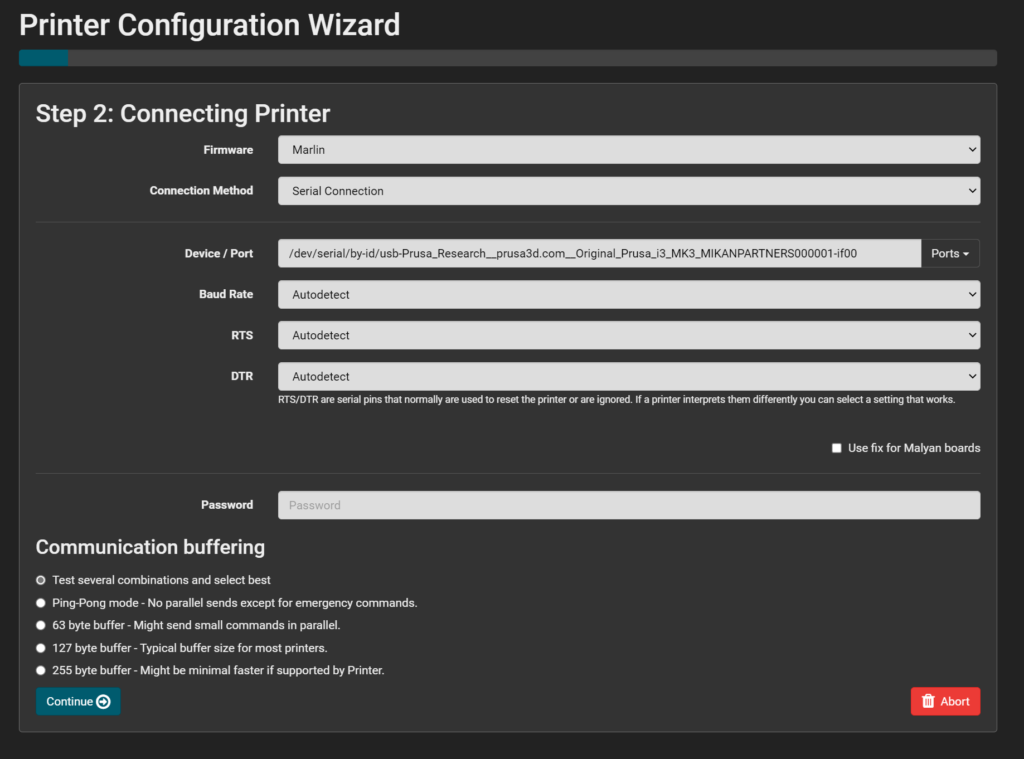
Repetier-Serverでも正しく認識していました!
かなりマイナーな内容ですが、困っている人がいれば何かの助けになればです。
EinsySerialnumberを開発した方に感謝感謝です。